Upscale Videos in Final Cut Pro: Step-by-Step Guide & Best Alternativee
Struggling with grainy footage or low-resolution clips in your projects? Final Cut Pro can enhance video quality by offering powerful built-in tools to rescue imperfect shots, but mastering them requires technical know-how. This guide demystifies professional-grade enhancement directly within Final Cut Pro, while also revealing when third-party tools outperform native solutions. Discover step-by-step techniques, objective comparisons, and smart workflows to transform lackluster videos into polished, professional content.

Contents:
Part 1. Overview of Final Cut Pro
Developed by Apple, Final Cut Pro stands as a top-tier professional video editing platform that masterfully balances advanced capabilities with intuitive workflows. Since its 2011 debut as Final Cut Pro X, it has become the industry-standard choice for cinematographers and content creators alike, particularly valued for its comprehensive video enhancement toolkit. This professional-grade software delivers robust color grading solutions and 4K/HD optimization through precision controls for brightness, contrast, and gamma adjustments, alongside dedicated sharpening filters and noise reduction algorithms. Beyond basic corrections, it also includes LUT support for cinematic color transformations, distortion effects for creative fixes, and real-time playback for efficient quality refinement, making Final Cut Pro an essential solution for elevating footage from amateur recordings to broadcast-ready productions.
Part 2. How to Enhance Video Quality in Final Cut Pro
Among various methods to improve video quality, Final Cut Pro can only upscale video. Here is a detailed guide to help you reset the resolution.
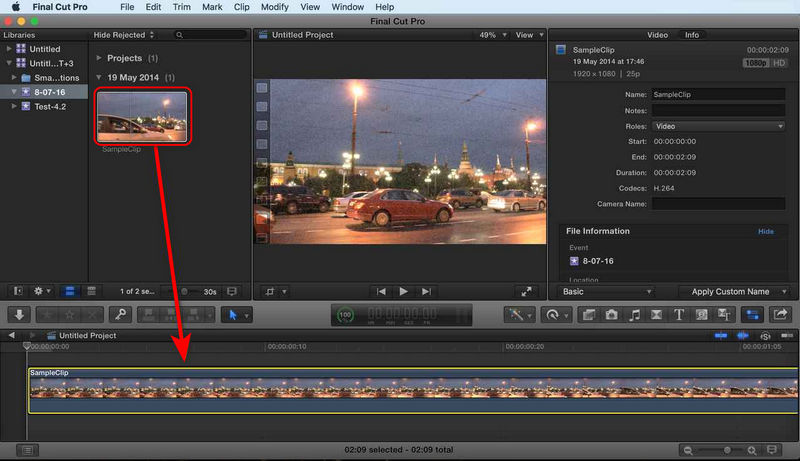
Step 1. Import your video into Final Cut Pro and place it on the timeline.
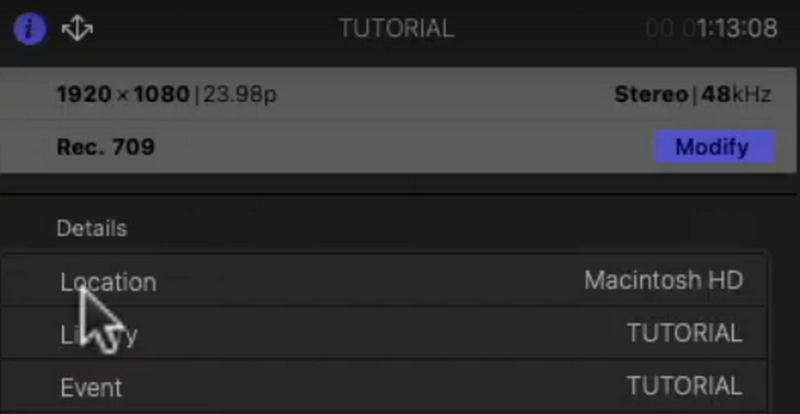
Step 2. Click the Modify button in the top-right corner to access resolution settings.
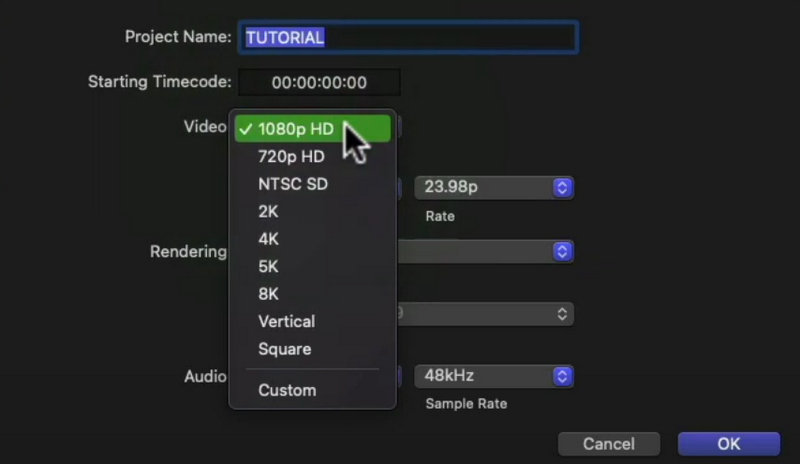
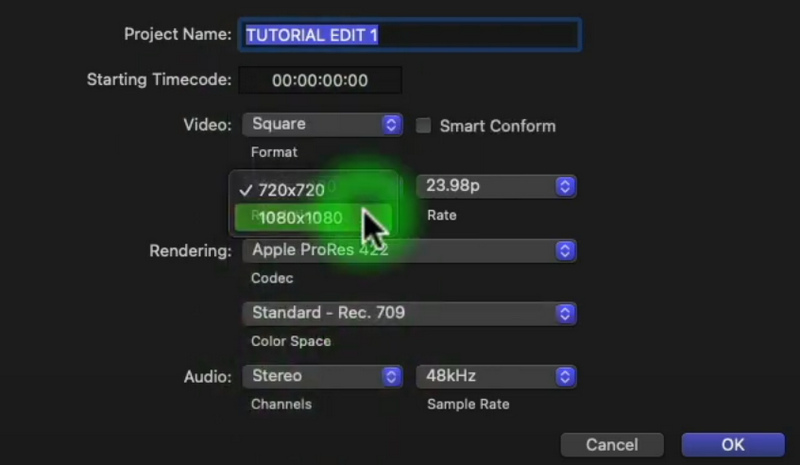
Step 3. Under Video, you can change the format to 1080p HD, 720p HD, 4K, 8K, vertical, square, and more.
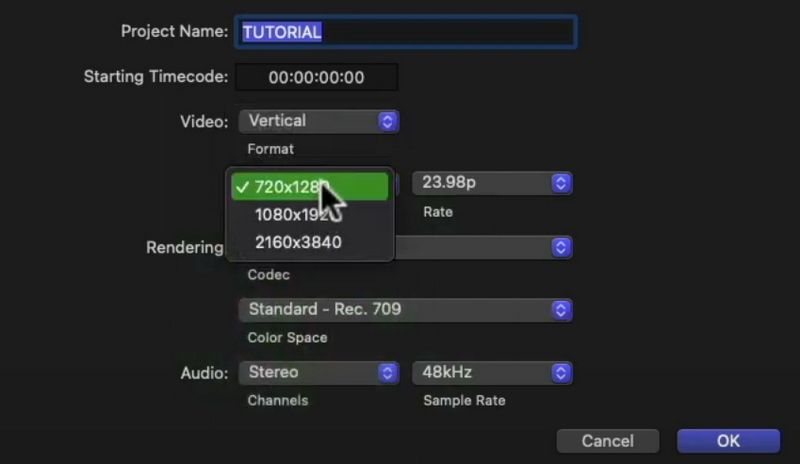
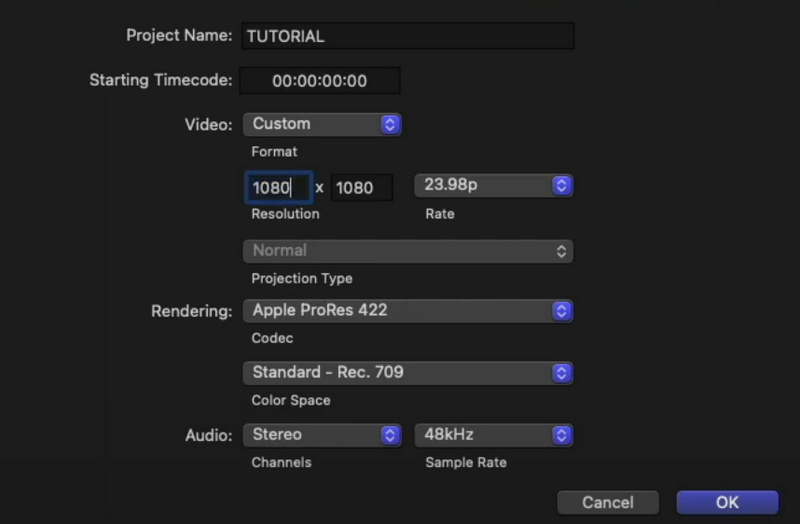
Step 4. If you have set the video format to vertical, you can adjust the resolution among 720x1280, 1080x1920, and 2160x3840. If you have set the video format to square, you can only choose between 720x720 and 1080x1080. If you chose custom in the last step, you can adjust the resolution based on your needs.
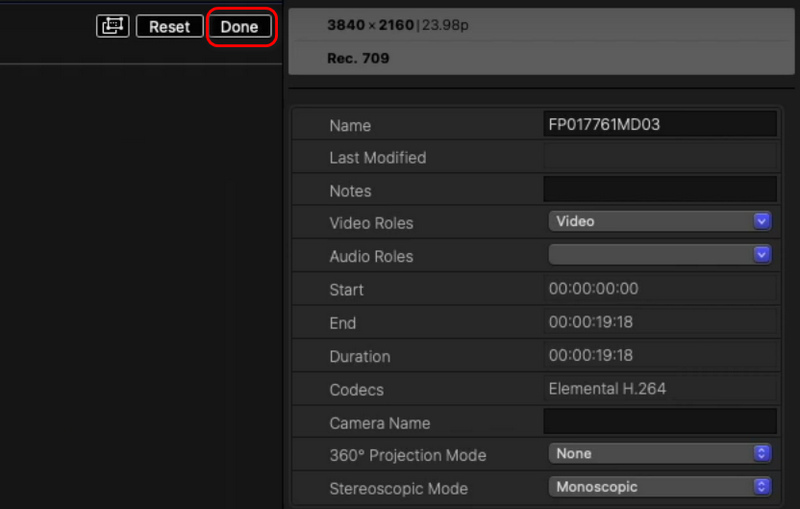
Step 5. Click OK to apply changes and hit Done to export the enhanced video.
Part 3. Best Final Cut Pro Alternative to Upscale Videos
From part 2, we can know that Final Cut Pro is unable to enhance video quality while upscaling video resolution. Although you can use it to upscale video resolution, the clarity cannot be guaranteed. Moreover, if you want to use this tool to improve the resolution of your video, you need to pay $299.99, which is not affordable for some video creators. Well, don’t be upset, you can also turn to other powerful video upscalers, such as VidHex Video Enhancer. Leveraging the updated artificial intelligence, it can help you to upscale resolution, reduce noise, sharpen blurry footage, and even interpolate frames for smoother motion. This tool is particularly effective for restoring old or low-resolution videos, as it analyzes each frame to restore lost details. More importantly, its UI is quite simple to understand and its operational efficiency is quite high.
Key Features:
• Enhance low-quality video via AI models
• Upscale video resolution to 4K/8K with one click
• Colorize B&W videos and turn them to life
• Increase video FPS with intelligent frame interpolation
• Remove video noise while preserving necessary details
• Enhance dark footage with lively colors
To help you quickly master how to use VidHex Video Enhancer, we have provided a detailed tutorial for you.
Step 1. Download and open the software. Here you can see various enhancement scenarios, including documentaries, films, anime videos, surveillance footage, game recordings, and so on.
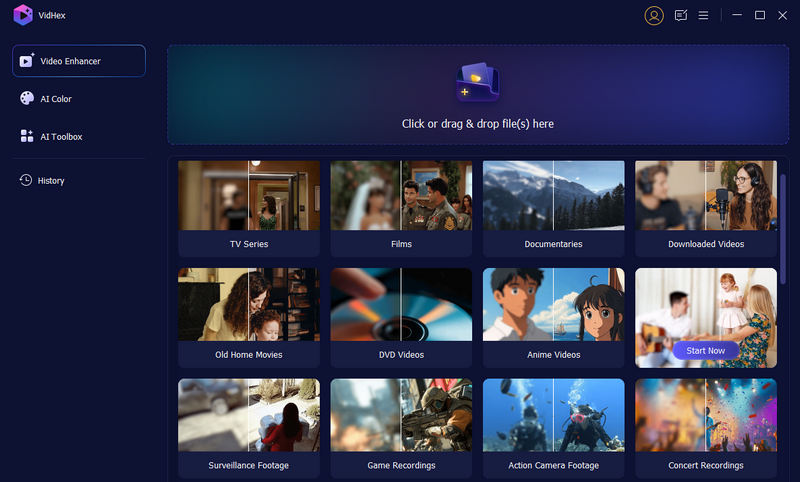
Step 2. You can import the video you want to enhance by clicking the scenario that matches your video. If they don’t match, you can also hit the Click or drag & drop files(s) here button or directly drag the video into it.
Step 3. Choose the AI model you would like to use to realize different goals. Detailed introductions of different models are provided when you put the cursor on them.

Step 4. Then, you can check the result by tapping the Preview button. While previewing, you can compare the enhanced version with the original side by side or just view the output in full screen to have a better view of the improvements.

Step 5. Click Export Full Video to save the enhanced video to your device.

Prefer a visual walkthrough? Watch the video below for more details.
Part 4. Comparison Between Final Cut Pro and VidHex Video Enhancer
| Final Cut Pro | VidHex Video Enhancer | |
|---|---|---|
| Core Function | Professional NLE (Editing Suite) | AI-Powered Video Enhancement Tool |
| Best for | • Full post-production workflows • Color grading • Multi-track editing | • Upscaling low-resolution footage • Noise reduction • Frame interpolation• Artifact repair • Colorizing B&W footage • Converting SDR to HDR |
| Key Strengths | • Precision color correction • Native Apple ecosystem integration • Advanced timeline editing | • Single-click AI enhancement • Batch processing • Cloud Acceleration |
| Output Quality | • Limited (Manual filters only) | • Detail reconstruction • Motion stabilization • Auto color recovery |
| Learning Curve | • Steep (Professional skills required) | • Low (One-click processing) |
| Price | • $299.99 one-time | • $31.92/month • $79.92/year • $239.92 for perpetual |
Part 5. FAQs about Enhancing Video Quality in Final Cut Pro
Does Final Cut Pro have a video upscaler?
Yes, Final Cut Pro includes built-in video upscaling capabilities, allowing you to increase resolution up to 8K or higher via custom project settings. However, its native upscaling relies on traditional algorithms, which may produce soft or artifact-prone results when upscaling low-resolution sources (e.g., 1080p to 4K).
Can I sharpen a video in Final Cut Pro?
Of course, you can. Final Cut Pro includes special 360° versions of some standard effects, such as blur, glow, and sharpen effects. You can apply the sharpening effect to enhance the clarity of your video. If you are not satisfied with the result, you can also turn to other powerful tools, such as VidHex Video Enhancer.
How to upscale videos to 4K in Final Cut Pro?
Import your footage into a 4K project via the same codec and apply a Sharpening effect. The chosen codec and how the effectively-filmed footage will determine the final quality. Of course, if you prefer an easier solution, you can also use VidHex Video Enhancer, which enables you to upscale you video to 4k with one click.
Conclusion
So, can Final Cut Pro upscale video? Technically speaking, yes. Its custom project settings enable resolution increases up to 8K. But as this guide revealed, its traditional interpolation lacks AI intelligence, often producing soft or artifact-heavy results with low-quality sources. For true quality enhancement, like detail reconstruction, noise removal, and intelligent upscaling, dedicated tools like VidHex Video Enhancer deliver superior, consistent outcomes through specialized AI models.

- Upscale videos to 4K/8K with AI.
- Increase FPS for smoother videos.
- Colorize B&W old recordings.
- Brighten the low-lit footage.
- Remove noise with details retained.