


 VidHex — Enhance video quality with AI
 Upscale video to HD/4K with AI technology with no quality loss and enhance detail and sharpness.
How to Upscale 1080p Video to 4K Using FFmpeg (Step-by-Step)

Upscaling video from 1080p to 4K is increasingly common — whether you're preparing content for a 4K display, restoring archival footage, or delivering professional presentations. FFmpeg, a free and open-source multimedia framework, handles this task efficiently through the command line. At the same time, AI-powered upscaling tools offer an alternative path with automated detail reconstruction.
This guide covers both approaches, so you can choose what fits your workflow, skill level, and quality requirements.
Tested on: Intel i7-13700K, 32GB RAM, Windows 11, FFmpeg 7.0, macOS Sonoma 14.5
Contents:
Part 1. How to Use FFmpeg to Upscale Video
FFmpeg is a free, open-source command-line tool for processing video and audio files. It's widely used by developers, media professionals, and enthusiasts who need flexibility and control over their output. Below is a complete FFmpeg guide for upscaling 1080p footage to 4K.
1. Install FFmpeg on your desktop
• On Windows
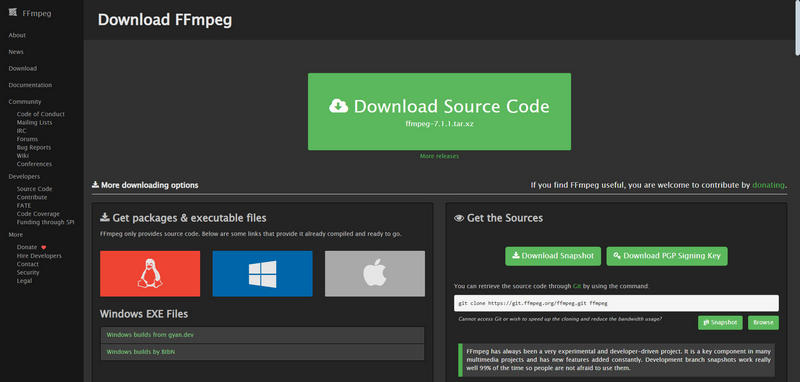
Step 1. Go to ffmpeg.org and navigate to the download section on the left side.
Step 2. Find the Get packages & executable files panel and click the Windows icon.
Step 3. Extract the downloaded ZIP file to a convenient location.
Step 4. Add the bin folder to your system’s PATH environment variable, which allows you to run FFmpeg commands from any directory in Command Prompt or PowerShell.
• On macOS
Step 1. Download the FFmpeg Mac package from its official site.
Step 2. Open Terminal and run brew install ffmpeg.
• On Linux
Step 1. Download the FFmpeg Linux package from its official site.
Step 2. Open Terminal and run sudo apt update, then sudo apt install ffmpeg.
After installation, open your command line interface (Command Prompt/PowerShell on Windows, Terminal on macOS/Linux) and type ffmpeg -version. If it shows version information, you can enter the next operation!
2. Launch FFmpeg
• For Windows: Search for “cmd” or “PowerShell” in the Start Menu and open it.
• For macOS/Linux: Open “Terminal”.
3. Navigate to Video's Directory
Tap in cd and press Space. Then, paste the folder path that contains your source video. For example, C:\Desktop\Users\MyVideos. Once done, press Enter.
4. Run the FFmpeg Upscaling Command
If your input file name is my_video_1080p.mp4, you can type the following command with your actual input filename:
ffmpeg -i my_video_1080p.mp4 -vf scale=3840:2160:flags=lanczos -c:v libx264 -preset medium -crf 23 -c:a copy output_4k.mp4
Brief explanations of each part of this command:
| Parameter | What It Does |
|---|---|
| -i my_video_1080p.mp4 | Input video file |
| -vf scale=3840:2160:flags=lanczos | Upscale to 4K using Lanczos interpolation |
| -c:v libx264 | H.264 codec for broad compatibility |
| -preset medium | Balance encoding speed vs quality |
| -crf 23 | Constant Rate Factor (lower = better quality) |
| -c:a copy | Copy audio without re-encoding |
| output_4k.mp4 | Output file name |
Alternative (H.265/HEVC for smaller files):
ffmpeg -i my_video_1080p.mp4 -vf scale=3840:2160:flags=lanczos -c:v libx265 -preset medium -crf 28 -c:a copy output_4k_hevc.mp4
5. Wait for FFmpeg Processing
FFmpeg will show progress in your command line window. The processing time depends on the length of your video, your computer’s processing power (CPU), and your previously chosen preset and CRF values. Then, you can find the result in the same directory as your input file.
Part2. FFmpeg vs AI Video Upscaling
| Aspect | FFmpeg (Lanczos) | AI Video Upscaler |
|---|---|---|
| Detail reconstruction | Pixel interpolation only | AI generates natural-looking details |
| Noise reduction | None built-in | AI distinguishes detail from noise, removes grain |
| Artifact handling | Can amplify artifacts | Trained to recognize and reduce artifacts |
| Color/contrast | No automatic adjustment | Auto color balancing, SDR-to-HDR |
| Learning curve | Moderate (CLI required) | Low (visual interface) |
| Processing hardware | CPU (GPU with extra config) | GPU recommended; cloud option |
| Cost | Free | Freemium ($15–$50/mo typical) |
| Batch processing | Yes, with scripting | Varies by tool |
Part 3. When to Use FFmpeg vs When to Use AI Tools
Choose FFmpeg if:
You need a free, scriptable solution for server-side or bulk processing
You're comfortable with the command line
Your source video is already high quality and just needs resolution upscaling
Choose an AI video upscaler if:
Your original footage contains visual issues that need improvement
You want to enhance video quality while upscaling
You prefer an easy-to-use interface instead of working with command-line tools
You need an all-in-one solution that combines upscaling with features like denoising and color enhancement
You want cloud acceleration to offload processing
Part 4. FFmpeg Limitations: What You Should Consider
FFmpeg is powerful, but it has clear limitations when used for video upscaling:
1. No intelligent detail generation — Lanczos only stretches pixels, it cannot "imagine" missing details.
2. No noise reduction — upscaling amplifies noise and artifacts from the source.
3. No color or tone correction during upscaling.
4. CPU-bound processing — GPU acceleration requires extra configuration.
5. Steep learning curve for beginners — syntax errors and PATH issues are common.
These gaps are where AI-based upscaling tools can offer a more complete solution. Below, we walk through how to upscale video with VidHex Video Upscaler, an AI tool that addresses all five limitations above in a single interface.
Part 5. How to Upscale Video with AI (VidHex)
VidHex Video Upscaler is one of the best AI upscaling software on the market. It has various AI models for different video enhancement needs, including upscaling, colorizing, denoising, SDR-to-HDR converting, upscaling FPS to 60, and more. Besides, this program offers cloud acceleration to save your computer resources and time. Just three steps, upscale your footage to 4K!
Step 1: Click the button below to download and install VidHex on your computer.
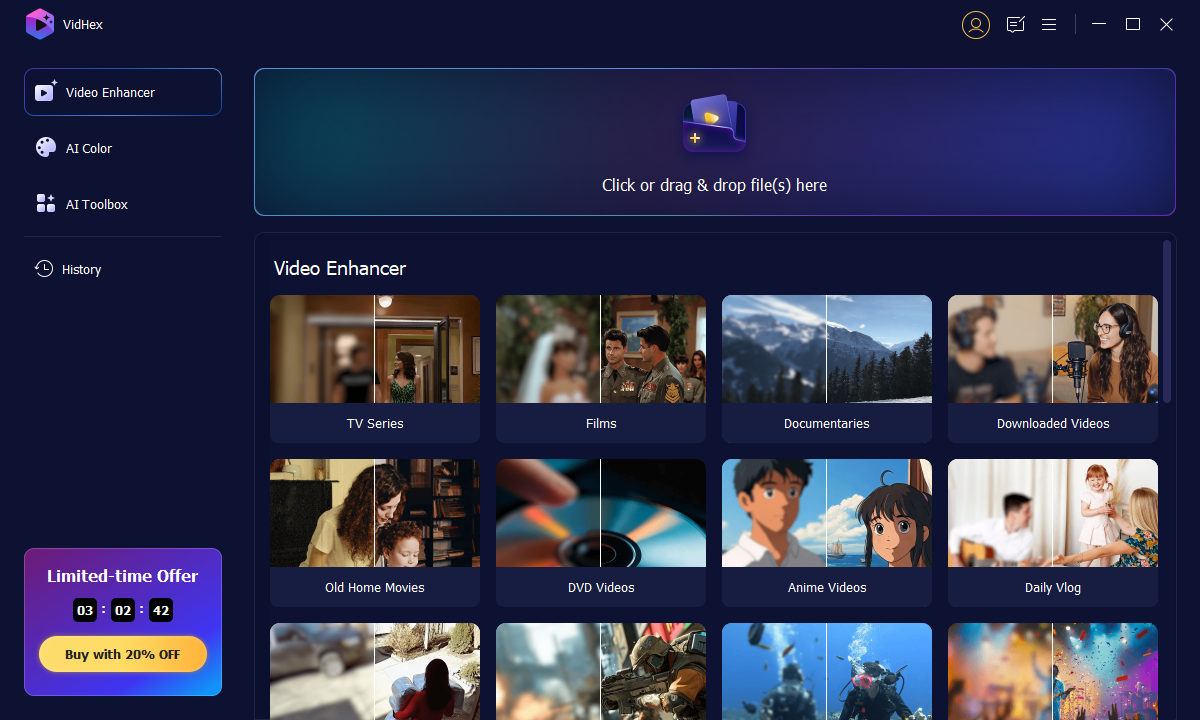
Step 2: When the installation finishes, launch VidHex and click the Click or drag & drop files(s) here area to import your footage.
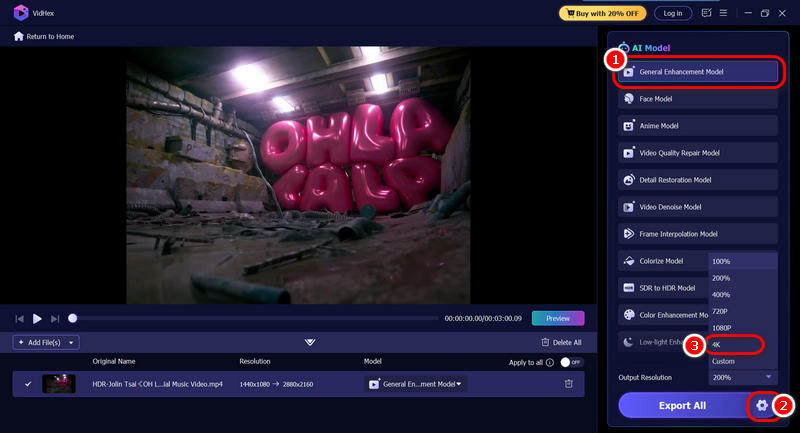
Step 3: After entering the editing window, select an AI model from the list on the right. Then, click the gear icon at the bottom right corner to select 4K as output quality.
Step 4: Hit the Export All button to send the upscaled footage out.
FAQs about FFmpeg and AI Video Upscaling
Can FFmpeg truly upscale 1080p video to 4K?
Yes, but via interpolation only — it stretches pixels without creating new detail. The result is sharper edges but no additional visual information.
What is the best FFmpeg command for upscaling?
The Lanczos command in Part 1 is best for most users. For higher quality, try -vf scale=3840:2160:flags=sinc or the zscale filter.
How long does FFmpeg vs AI upscaling take?
FFmpeg (CPU) takes 2–5× longer. Expect 20–60 min (FFmpeg) vs 5–30 min (AI with cloud GPU) for a 10-min clip.
Do AI upscaling tools work offline?
Desktop AI tools work offline after installation. Cloud acceleration requires internet. FFmpeg works entirely offline.
Can I batch-process with FFmpeg?
Yes — write a shell script to loop through files. Most AI tools also support batch processing via a visual queue.
What resolutions can I upscale to?
Any resolution up to available memory: 1440p, 4K, 8K, etc. Higher resolutions demand more processing time and RAM.
Conclusion
All in all, upscale video with FFmpeg is a feasible solution. Yet, this tool only enlarges your footage without denoising or blur removal. You just received an enlarged file, but still noisy and blurry. So, our highly-recommended AI tool, VidHex Video Upscaler, is a more comprehensive and easier solution for your 1080P to 4K conversion. This tool offers multiple AI models to upscale your footage from all aspects. Just download one and try now!

- Upscale videos to 4K/8K with AI.
- Increase FPS for smoother videos.
- Colorize B&W old recordings.
- Brighten the low-lit footage.
- Remove noise with details retained.


