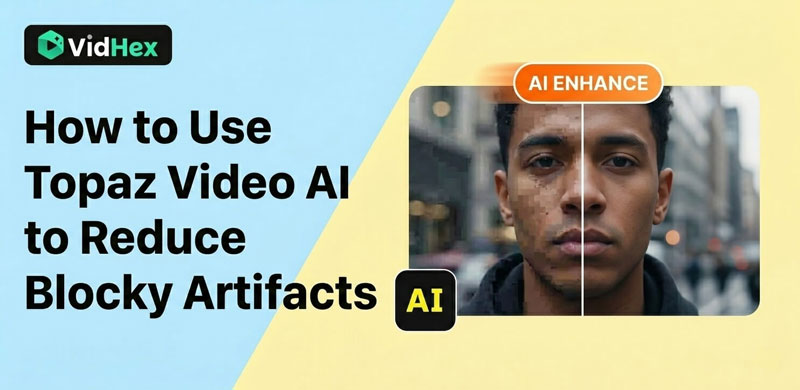
How to Use Topaz Video AI to Reduce Blocks in Videos: The Ultimate Guide in 2026
If you have ever watched an old video or a heavily compressed clip and noticed large square blocks in dark or fast-moving areas, you have seen macroblocking. Macroblocking happens when a video has a very low bitrate, strong compression, or was encoded with an old codec. To save space, the encoder removes image data. When too much data is removed, the video looks blocky and broken.
Traditional tools try to fix this by blurring the image. While this can hide the blocks, it also removes real details. The result often looks soft and unnatural.
Topaz Video AI, developed by Topaz Labs, takes a different approach. Instead of simply smoothing the image, it uses deep learning to rebuild missing details. It analyzes patterns in the video and predicts what should be there. This allows you to turn damaged, compressed footage into clean, professional-looking visuals.
In this guide, you’ll learn how to use Topaz Video AI step by step, even if you’re a beginner.
Contents:
Part 1. Preparing Your Footage for Deblocking
Before you start, check your source file carefully.
First, ask yourself:
• Is the video extremely low resolution (like 240p or 360p)?
• Is the bitrate very low?
• Are the artifacts present throughout the video, or only in certain scenes?
The better the source, the better the final result. AI can improve damaged footage, but it cannot fully restore information that is completely lost.
Next, make sure your computer can handle the processing. AI video enhancement is GPU-intensive. Check the official system requirements on the Topaz Labs website to confirm your graphics card is supported. A modern NVIDIA or AMD GPU is highly recommended. Without a strong GPU, rendering will be very slow.
Preparing properly will save you time and frustration later.
Part 2. Best Topaz Video AI Settings for Removing Compression Blocks
Step 1: Import Your Video
Open Topaz Video AI. Simply drag and drop your video file into the interface. The software will automatically analyze the clip and suggest default settings.
Do not export immediately. The default settings are only a starting point.
Step 2: Choose the Right Model (The Most Important Step)
Model selection is the key to reducing compression blocks effectively.
• Proteus Model. Proteus is best for manual control. It gives you sliders to adjust settings like Fix Compression and Reduce Noise. If you want precise control over the deblocking process, start here. Increase Fix Compression gradually until the blocks fade away, but avoid pushing it too far.
• Iris Model. Iris is designed for low-quality faces and heavily compressed portraits. If your video includes people, and their faces look distorted or blocky, Iris can improve skin texture and facial clarity without making it look artificial.

• Nyx Model. Nyx works very well in lightening dark scenes and for footage with heavy noise and blockiness. It is especially good at cleaning artifacts while preserving natural grain and texture. If you are restoring older film or cinematic footage, Nyx is often a strong choice.
There is no single "perfect" model. Test short preview sections before processing the entire video.
Step 3: Fine-Tune the Parameters
After choosing a model, adjust the settings carefully.
Start with "Relative to Auto." This uses the AI’s automatic analysis as a base, and you make small adjustments from there. This is safer than starting from zero.
Here are some important tips:
• Increase Fix Compression slowly.
• Use Reduce Noise only if needed.
• Keep Recover Detail low at first.
Pro Tip: If Recover Detail is set too high, the AI may think the compression blocks are real details. It may try to sharpen them instead of removing them. This can make the problem worse. Always preview changes before exporting.
Work in small steps.Subtle adjustments usually give the most natural results.

Part 3. The Two-Pass Strategy for Severe Artifacts
If your footage is extremely damaged, a single pass may not be enough. In this case, use a two-pass workflow.
Pass 1: Cleanup at Native Resolution
First, process the video at its original resolution. Do not upscale yet.
Use Proteus or Nyx to remove compression artifacts only. Focus on cleaning the image. Once the blocks are reduced, export the video using a high-quality codec such as Apple ProRes. This prevents new compression artifacts from being added.
Now you have a clean master file.
Pass 2: Upscale and Enhance
Next, import the cleaned video back into Topaz Video AI.
Now you can safely upscale to 1080p or 4K. Because the compression blocks were already removed, the AI can focus on enhancing real details instead of trying to interpret damaged data.
This two-step method produces much better results than cleaning and upscaling at the same time, especially for severely compressed footage.
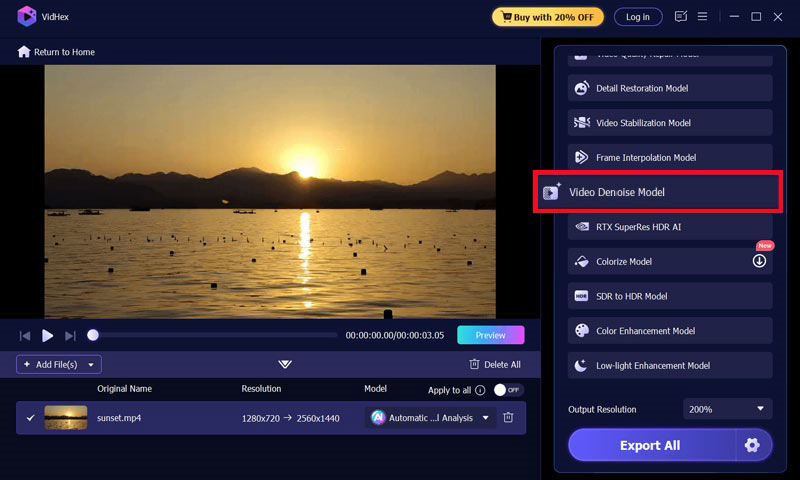
If you go through these step-by-step tutorials and still feel overwhelmed by settings, I also recommend a simpler and more convenient alternative — VidHex Video Enhancer. The process is very simple. It offers 11 different video enhancement models, including the Video Denoise Model, which can effectively remove blocky artifacts from videos without worrying about GPU overload, while adjusting parameter settings. Below are the steps to download and try it for free.
Step 1. Open VidHex via a web browser such as Chrome or Safari. Click the download button on the page. After installation, add your target files by clicking Add File(s) in the interface.
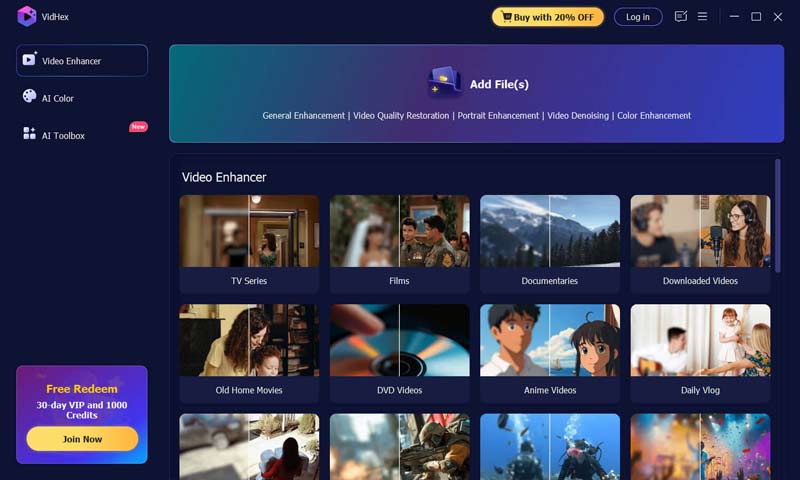
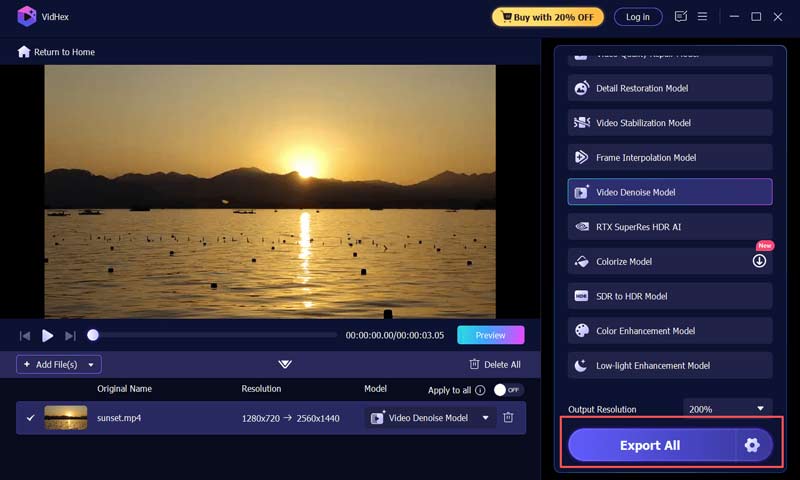
Step 2. Choose the Video Denoise Model on the right side of the page.
Step 3. Click Preview to check if the result meets your expectations.

Step 4. If satisfied, click Export Full Video directly.
Part 4. FAQs about Topaz Video AI & Deblocking
Q1: Why Does My Video Look "Plasticky" or like an "Oil Painting" after Deblocking?
A: This "waxy" look happens when the Reduce Noise setting is too aggressive, or the Recover Detail is too low. To fix this, back off the noise reduction sliders and try using the Add Grain feature (usually around 1.5 to 2.5) to re-introduce a natural, organic texture that mimics real camera sensor data.
Q2: Which AI model is Best for Extremely Low-Quality YouTube or CCTV Footage?
A: The Iris model is generally the winner for low-res footage, especially if people are involved, as it is trained to reconstruct facial features from blocky messes. For non-human subjects (landscapes/objects), use Proteus and manually increase the Fix Compression slider until the blocks disappear in the preview window.
Q3: Can Topaz Video AI Fix "Color Banding" alongside Blocky Artifacts?
A: Yes. Blocky artifacts and color banding often go hand-in-hand in 8-bit compressed videos. By using models like Proteus or Nyx and exporting to a 10-bit or 12-bit format (like ProRes 422 HQ), the AI helps smooth out the gradients, significantly reducing the "staircase" effect in skies or shadows.
Conclusion
In the past, removing macroblocking required complex filters and manual adjustments in professional editing software. The process was slow and often destroyed fine details.
With AI tools like Topaz Video AI or VidHex, the workflow is much simpler. Instead of hiding problems with blur, the software intelligently reconstructs missing information. This saves hours of manual work and delivers cleaner, sharper results.
While AI cannot perform miracles, it can dramatically improve low-quality footage when used correctly. By choosing the right model, adjusting settings carefully, and using a two-pass workflow for severe cases, you can turn blocky, compressed videos into clear and professional visuals.
Start with small tests, stay patient, and let the AI do the heavy lifting.