
How to Improve Frame Rates to 120 FPS [The Ultimate Guide]

Have you ever noticed how a cinematic blockbuster flows like real life while a choppy home video feels jarring? The secret often lies in the frame rate. Whether you are asking "how to improve frame rates" for smoother gameplay or “how to get better FPS” in your edits, understanding this invisible force behind fluid visuals is key. This article unpacks what frame rate really is, why it decides whether movement feels cinematic or clunky, and then reviews five user-friendly tools that can lift any clip from choppy 24 fps to buttery 60 fps or even 120 fps without sacrificing sharpness or color. After reading this article, you can easily realize the transformation of stuttering clips into silky-smooth visuals using 4 useful tools, turning those jerky moments into cinematic fluidity.
Contents:
Part 1. Understanding Frame Rate
Definition of FPS
Frames per second (FPS) refers to the number of images displayed on your screen per second of a video. It is a metric that qualifies the frame rate, which is associated with the smoothness and fluidity of a video.
Why Does Frame Rate Matter?
Frame rate is not only a technical spec but also the heartbeat of visual storytelling. A higher frame rate (like 60fps or 120fps) doesn’t just make action smoother. Additionally, it sharpens split-second details in fast-paced scenes, reduces motion blur, and future-proofs content for emerging high-refresh-rate displays. Conversely, undershooting the ideal frame rate risks breaking immersion.
Distinctions Among Different Frame Rates
24fps brings a classic cinematic feel and is often used in movies for its “film-like” motion blur. 30fps balances smoothness and file size, making it standard for TV shows and casual videos. 60fps feels noticeably smoother, ideal for gaming, sports, or action scenes where clarity matters. 120fps delivers ultra-fluid motion, perfect for slow-motion effects or high-refresh-rate displays, but requires more storage and processing power.
Part 2. How to Improve the Video Frame Rate
VidHex
As a versatile video enhancer, VidHex Frame Interpolation can help you fix corrupted videos via its intelligent frame interpolation function, creating a smooth visual playback. Besides this feature, this powerful video enhancer is equipped with other functions for you to improve the quality of your video. For example, it serves as a good helper to you in upscaling resolution, reducing noise, and sharpening blurry footage. What makes this software stand out is its operational efficiency and simple UI. For green-hand editors, it is difficult to remember the function of various buttons clearly and their specific locations. However, VidHex streamlines the operational procedures by just a few clicks. So, for users who prioritize efficiency and simpleness, this software is the best option.
Features:
• Automatically enhances video smoothness with AI-supported frame interpolation
• Accelerates interpolation via cloud acceleration, conserving time and device resources
• Supports multiple resolutions (including 4K) and formats (MP4, AVI, MKV, etc.)
Here is a tutorial helping you to increase the FPS:
Step 1. Download VidHex from its official website.
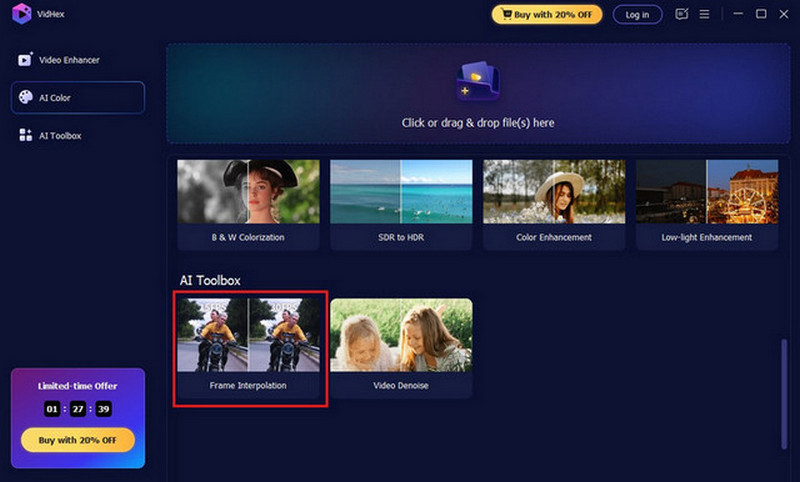
Step 2. Run this software on your device. From the main interface, move to the menu on the left. Click the AI Toolbox section. Here you can see the Frame Interpolation model, select it.
Step 3. Import the video you want to raise the FPS.
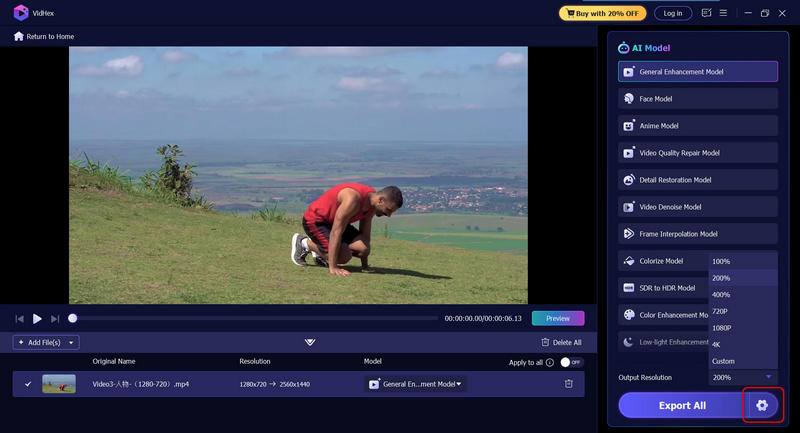
Step 4. Choose the Frame Interpolation Model to enhance video playback, thus ensuring ultra-smooth, fluid motion for a seamless viewing experience. You can also choose to increase the frame rate by 2X or 4X manually.
In addition, click the gear icon next to the Export All button. Here, you can adjust the output resolution, format, bitrate, and encoder.
Step 5. Then, you can review the result by clicking the Preview button to review the results. Moreover, you can compare the enhanced version with the original in full-screen or side-by-side comparison mode to have a better view of the brightening.

Step 6. Click the Export Full Video button to save the improved video to your device.

VEED
The second option is VEED Video Frame Rate Converter, which enables you to adjust your video’s frame rate online. You can change your video’s frame rate to 16 FPS, 24 FPS, 30 FPS, and 60 FPS. Moreover, this tool supports various video file formats, including MP4, MPEG, and so on. But if you don’t subscribe to it, there will be a watermark left in your video when you export and save it. Here is the guide to using this tool to increase the FPS:
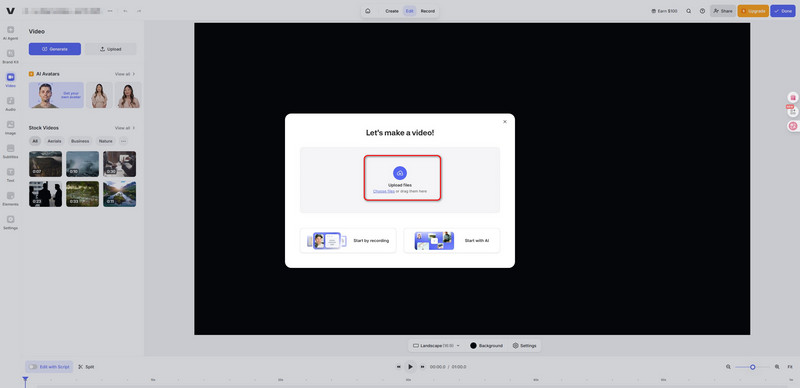
Step 1. Go to the official website of VEED and import your video.
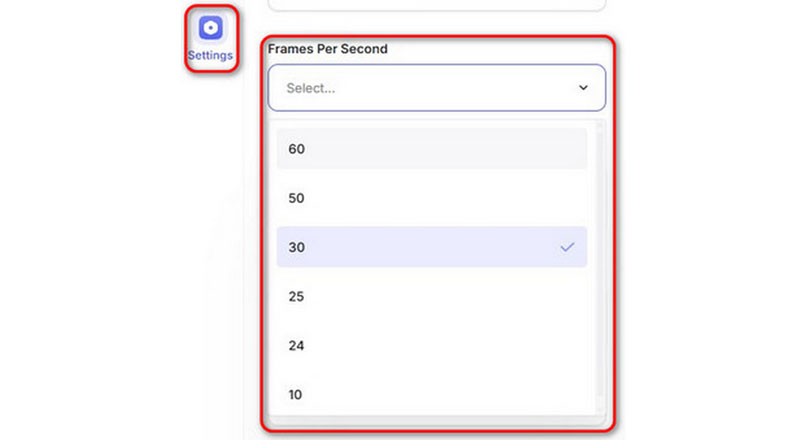
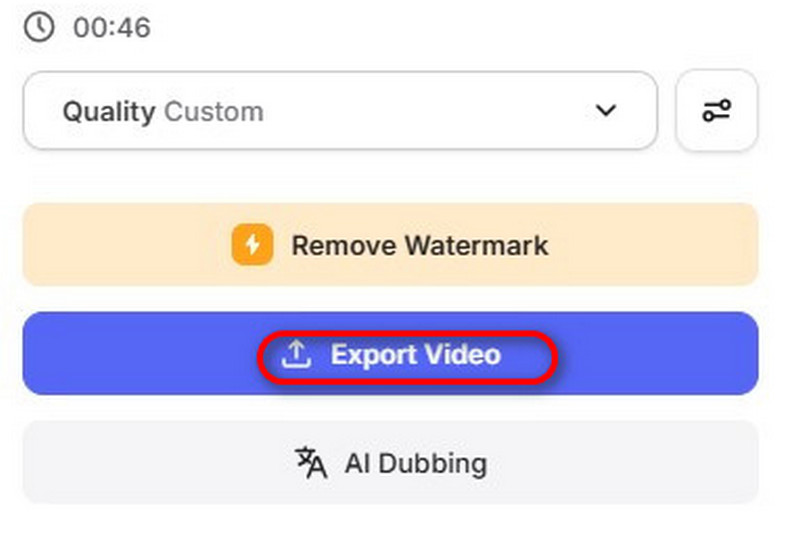
Step 2. Click the Settings on the top left of the screen and set the frames per second. Here you can choose from 10 fps, 24 fps, 25 fps, 50 fps, and 60 fps as you like.
Step 3. Click the Done button in the top right corner and click Export Video to save your video.
Adobe Premiere Pro
For some professional video editors, Adobe Premiere Pro is also a good choice. Equipped with various advanced editing features, this tool can also serve as an excellent video smoother for users to turn the corrupted footage into a fluid one. However, this software may be somewhat complicated for beginners because its UI is very complex. If you prefer easier methods, you can choose other tools as you like. The detailed tutorial is as follows:
Step 1. Run this software and import your video into the timeline.
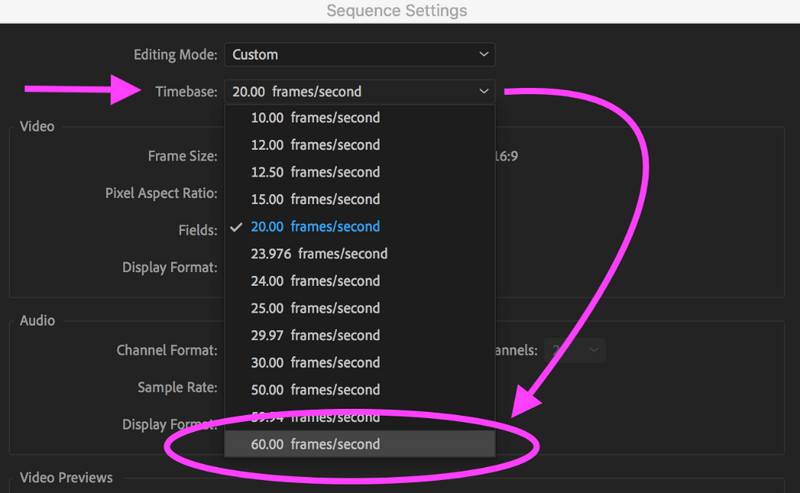
Step 2. Go to the Project panel and choose Modify Sequence Settings.
Step 3. Position the Frame Rate section in the Interpret Footage dialog box.
Step 4. Select the Assume this frame rate button and set the FPS you want.
Step 5. Click OK to put the changes into effect and save your video.
HandBrake
If you tend to leverage easy software to raise the FPS, you might as well try HandBrake. It is a free frame rate converter, allowing you to adjust the video frame rate within 5fps to 120fps. However, you can’t compare the original video with the improved one simultaneously, so it may take you several times to change the FPS until you are satisfied with the result. Here are the specific steps to guide you to better use this tool:
Step 1. Run HanBrake and import the video you want to increase the video frame rate.
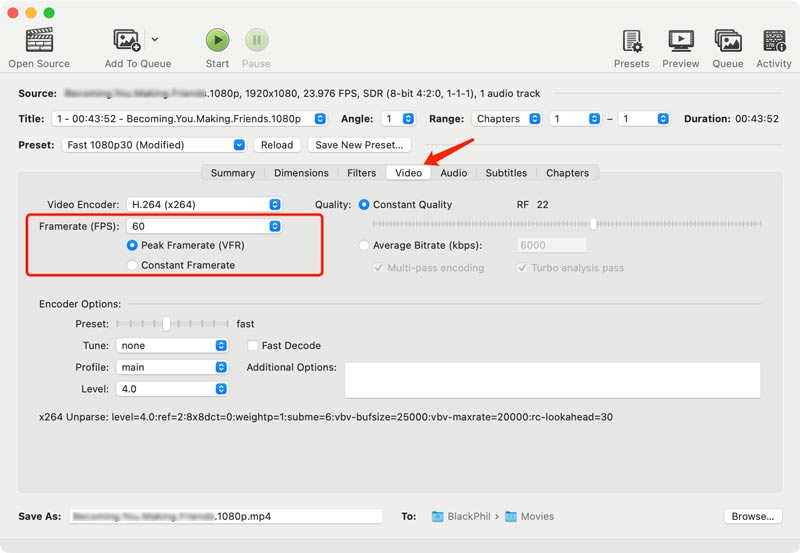
Step 2. Tap the Video tab and find the Framerate (FPS).
Step 3. Choose the appropriate FPS from the dropdown.
Step 4. Export it and save it to the destination folder.
Part 3. FAQs about How to Get Better FPS
Why is my FPS so low?
Your FPS might be low due to an unstable internet connection, insufficient device performance (e.g., outdated processor or low RAM), excessive background apps consuming resources, or overheating, causing thermal throttling.
Is 120 FPS better than 60?
It depends on your needs. The better choice is associated with your screen’s capabilities, content type, technical constraints, and other factors, so neither of them is better.
Is 30 FPS good for gaming?
For many gamers, 30fps is considered the bare minimum for acceptable gameplay, but not ideal, especially for fast-paced, competitive games. While 30fps is playable, 60fps and higher provide a smoother and more responsive experience.
Conclusion
Mastering frame rate isn’t just about chasing higher numbers. Instead, it’s about aligning your FPS increaser choices with your creative vision and technical needs. Whether you’re struggling with lagging footage or aiming to raise FPS for immersive gaming or cinematic storytelling, tools like video smoothers (e.g., VidHex, VEED, or Adobe Premiere Pro) empower you to transform stuttering clips into fluid masterpieces. However, there still exist some drawbacks in some options. So, pick the right tool for your workflow, experiment with frame interpolation or conversion, and let your visuals speak with the clarity and smoothness they deserve.


