Changing The Frame Rate Of the Video on Your Desktop Device
Having a video played on high-resolution settings sometimes is not enough to achieve a seamless video playback experience, as high-resolution quality can suffer from a low FPS, resulting in a more choppy or stuttery video motion. Frames Per Second (FPS) is a measurement that determines how many individual frames of images in videos can appear in a second. This will determine how a video plays, whether smoothly or not. Moreover, as a video of lower FPS typically serves as the standard for most casual videos, having more FPS on the video will result in smoother video motion and playback. Thus, both have their effects and uses for video; it is up to users which one they want to use for their video.
In this guide, you will discover the best method and steps to follow in changing your frame rate using a wide selection of video editing software and online tools. Furthermore, as you read on, you will learn how to adjust your video frame rate. We also provide a quick overview to explain what Frame Rate means, ensuring you have a complete understanding of the term and effectively know its purpose in video. Thus, you will have an easy time later understanding FPS when it comes to actually improving your video FPS on your own using our simplified methods.
Contents:
Part 1. What Does Frame Rate Mean?
Frame Rate, or most commonly known as FPS, refers to the number of images displayed per second, which makes up the totality of the video. You may think of it as a flipbook for a better understanding of the term, as the number of pages you flip corresponds to the number of frames that are displayed, but at a span of only a second. Having a higher rate can result in a smoother video motion. Otherwise, fewer frames or lower frames will cause stuttery or sloppy motion.
The most common FPS used on a video for standard video playback is 24 FPS, which has a slight motion blur, but for the naked eye, it is unnoticeable, making it the preferred FPS used in exporting videos. Another thing about FPS is that changing or adjusting it before exporting your videos can make a difference not just on the video playback but also the file size of your video as having to use higher FPS has a larger file size and will take more time in exporting and having a lower FPS is much storage friendly and fast to export which also important when you started in knowing what FPS is and proceed to adjust your video FPS later on.
Part 2. How to Change Frame Rate
1. Best FPS Improver: VidHex Frame Interpolation
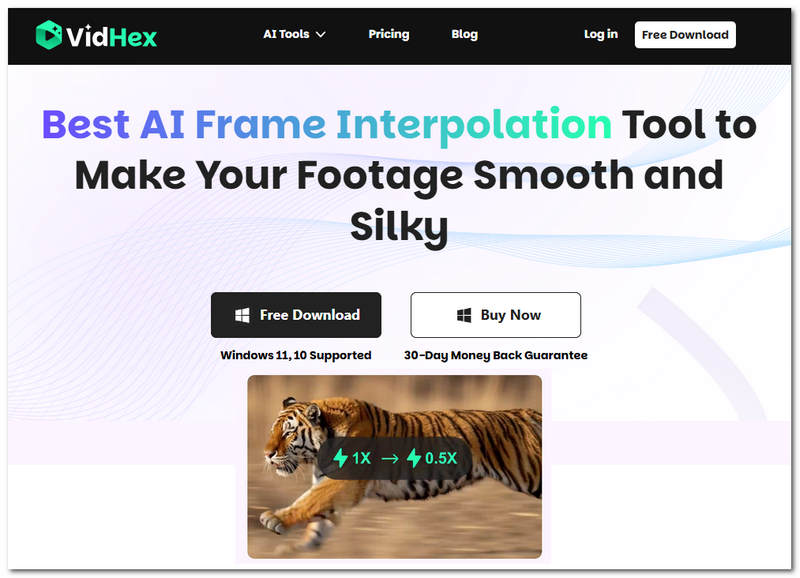
VidHex Frame Interpolation is just one of the generous video enhancement features of VidHex, offering to its users. As one of the frontiers of integrating AI technology for video enhancement, VidHex focuses on providing seamless and quick solutions. Just like their FPS improver tool, it is capable of enhancing your video FPS while maintaining its video resolution, ensuring a lossless video quality export.
Having to know the best FPS improver to use on this list, VidHex is surprisingly able to compact all of its video enhancement feature including video FPS improver into a single software tool yet still manage to be accessible on all type os users as it can be easily and freely to install on desktop device that is also a lightweight and doesn’t consue space on user devices. You can even use it to change FPS of MP4.
Key Features
• Lightweight and easy-to-use FPS video improver.
• Capable of converting low FPS videos into high FPS videos.
• It has a video frame rate enhancer with a quality of up to 4x better.
• Guaranteed to produce results without losing video quality.
• It can generate slow-motion video effects.
• Capable of addressing and fixing videos suffering from choppy or stuttery problems.
• Smartly analyzes video frame-by-frame.
• AI-powered FPS improver tool.
Step 1. Install the VidHex Frame Interpolation software tool on your desktop device.
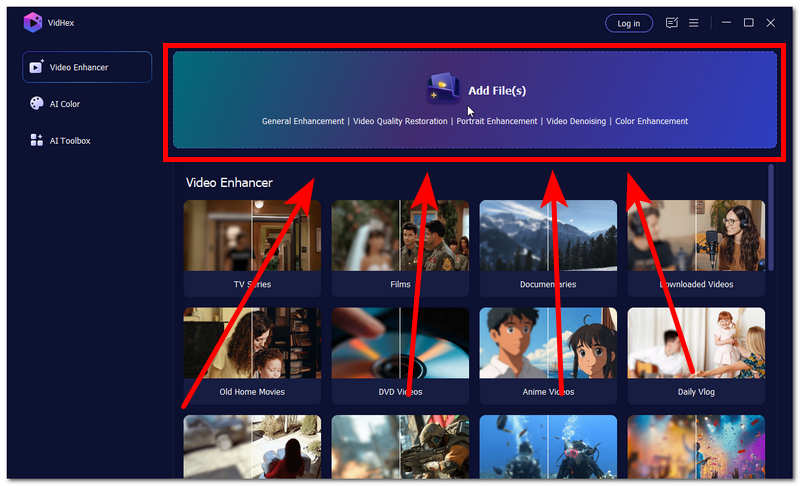
Step 2. Next, open the software tool and from its main interface, click on the Add Files section at the top of the tool to upload the video you want to improve its FPS.
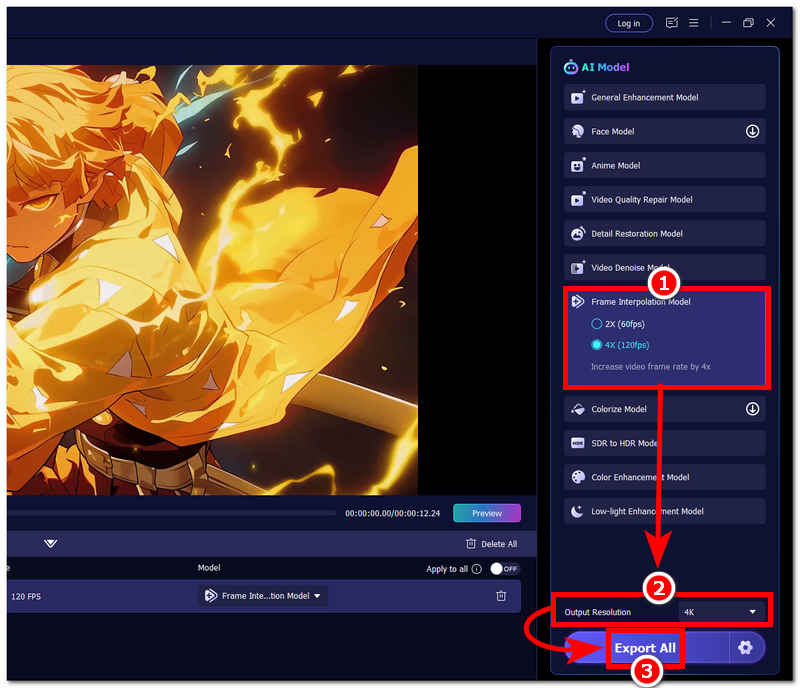
Step 3. Once you manage to upload your low FPS video onto the software tool, you should navigate your way to the right-most part of the tool to locate the list of available AI models. For this matter to seamlessly improve your video FPS, be sure to use the Frame Interpolation Model and use the 4X option.
Step 4. Finally, to ensure that you will have a lossless video quality when saving your now improved FPS video, be sure to set your Output Resolution to 4K. Once done, save your video to your desktop device by clicking on the Export All button. This will automatically start the process. You can just wait for it to finish.
2. Handbrake
If you have a Handbrake software tool or are familiar with using this tool, follow the steps below to adjust your video file's FPS setting to your liking.
Step 1. Download and install Handbrake on your desktop device (Mac or Windows).
Step 2. Proceed to launch the Handrabke software tool on your desktop device, and from its main interface, drop your video file in the designated field.

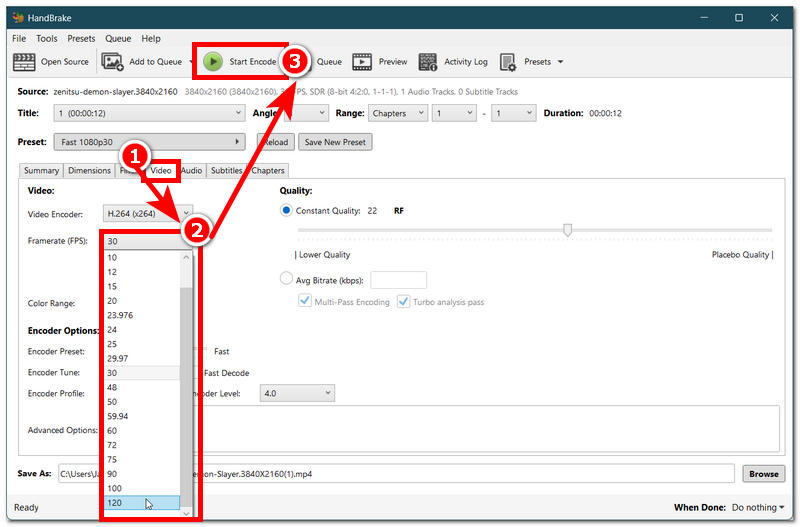
Step 3. Once you manage to upload your video onto the software tool, locate and click on the Video section setting on the tool.
Step 4. From the Video section settings, go to the FPS setting and adjust your video FPS to your liking. Once done, click on the Start Encode button at the top of the tool to start the process of changing your video FPS.
3. Adobe Premiere Pro
For a more professional level of video editing and export, Adobe Premiere Pro can also be used to adjust your video's FPS. So if you are curious how to change frame rate in Premiere Pro, then you'd better see our steps for it.
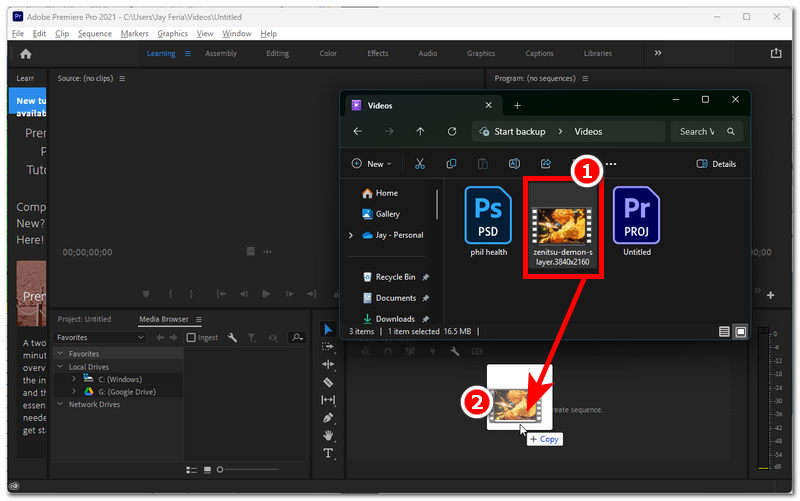
Step 1. Download Adobe Premiere Pro software to your desktop device, and once done, open it. From the tools interface, drag and drop your video file onto the main interface to upload it.
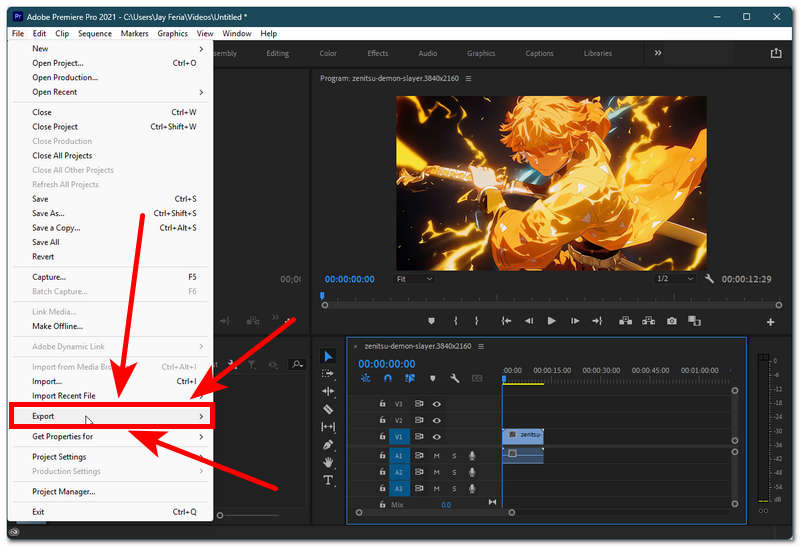
Step 2. Once your video is loaded into the Adobe Premiere Pro timeline, to change your video FPS, export your video by following this navigation: File > Export.
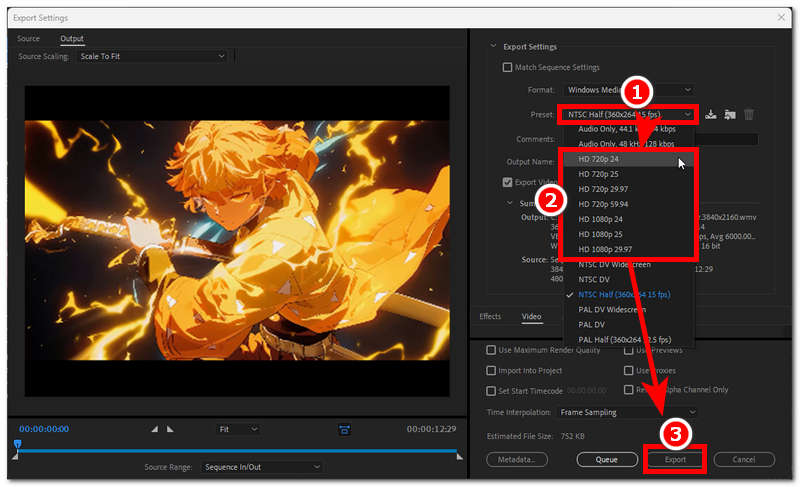
Step 3. A new window will appear on your screen, displaying your Export settings page. From there, locate the Preset section and choose a video quality that has a higher frame rate.
Step 4. Once you have chosen and selected a Preset with a higher FPS, you may save your video to your desktop device by clicking on the Export button on the lower right part of your screen.
4. DaVinci Resolve
Davinci Resolve is a powerful and well-known editing tool that can not only change frame rate, but also upscale videos with Davinci Resolve. How to change frame rate in DaVinci Resolve? See our simplified steps below for a straightforward adjustment of your video FPS.
Step 1. Open your DaVinci Resolve software from your desktop device, and from its main interface, create a New Project to load your video into the tool.
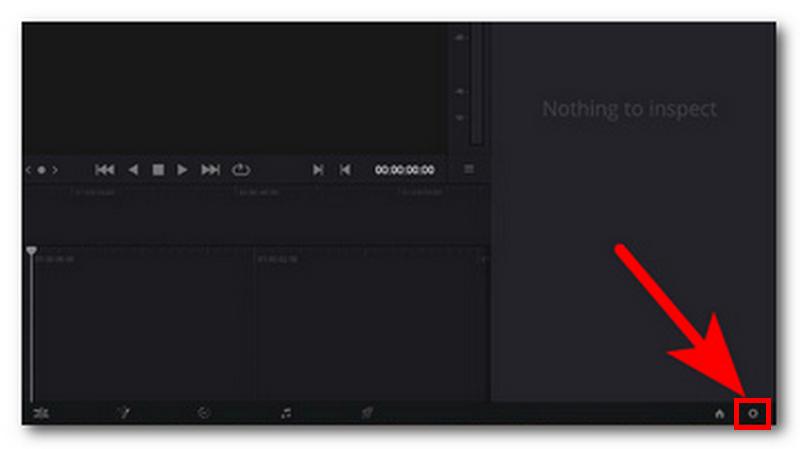
Step 2. Once you load your video on the software, click on the DaVinci Resolve Settings located in the lower-right corner of the software.
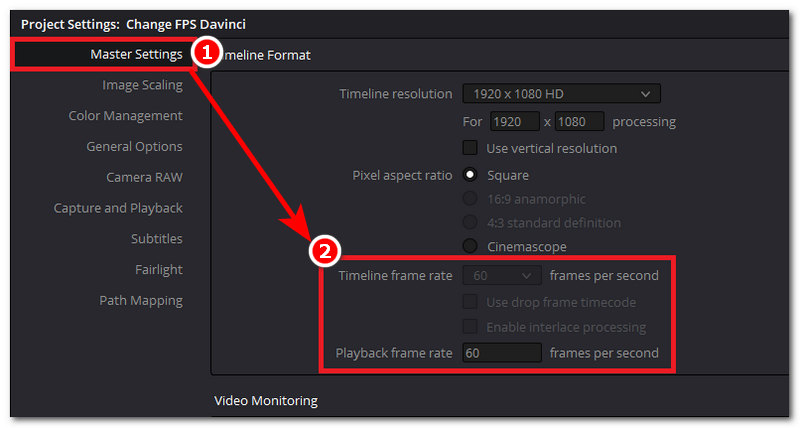
Step 3. Proceed to head over to the Master Setting of the tool, and from there, you will be able to locate the FPS of your video. Simply change your video FPS to your preferred setting, and once done with it, head back to your main timeline, and from there, you may export your video.
5. VLC Media Player
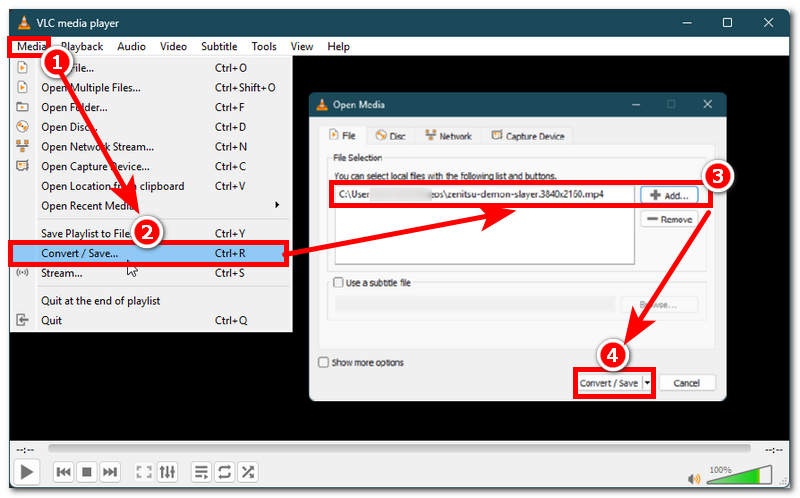
Step 1. Open your VLC Media Player from your desktop device, and from its main interface navigate your way to the Conver/Save setting by clicking on the Media > Convert/Save Navigation from the upper-left corner of the player.
Step 2. From the Convert/Save setting, click on the Add file button. After uploading your video, click on the Convert/Save button to proceed.
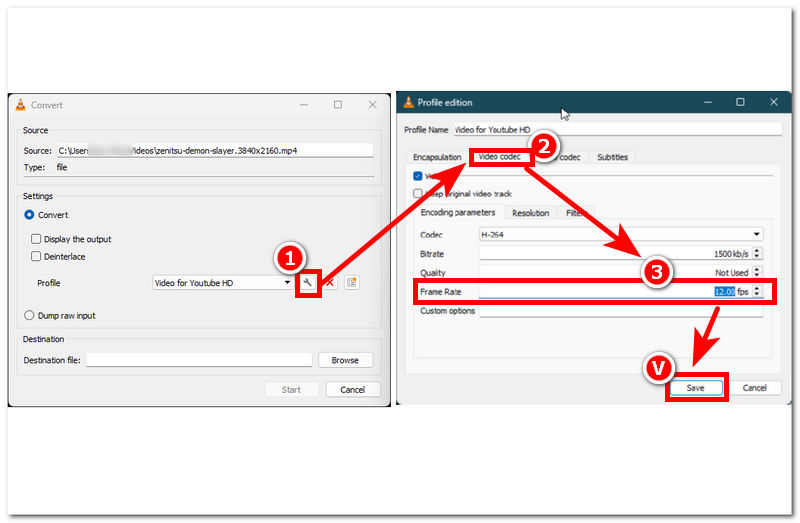
Step 3. A new window will appear on your screen. Click on the Settings icon button to access the Video Codec section menu.
Step 4. From the Video Codec section, you will see your video Frame Rate setting. Simply type in the number of Frames you want to apply to your video. Once you have your preferred FPS, click on the Save button to have it apply to your video.
6. Ffmpeg
Step 1. Install FFmpeg software on your desktop device.
Step 2. Open your command prompt and from there enter the following command:
ffmpeg -i (file name) -r (new frame rate) (new name).mp4
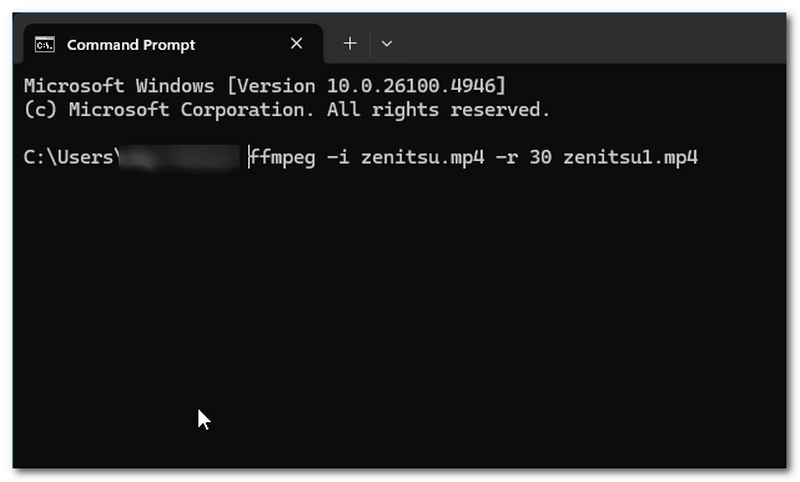
Step 3. Hit the Enter key on your keyboard, and it should automatically run the command. Just wait for it to get done.
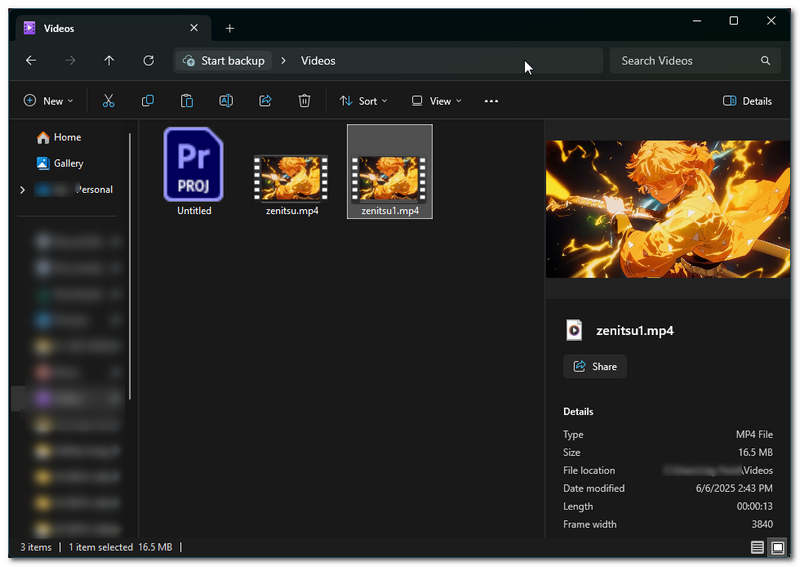
Step 4. A new video file will appear in this same folder as your low FPS vFPS video, indicating that you successfully created a copy of your old video with a new, higher frame rate.
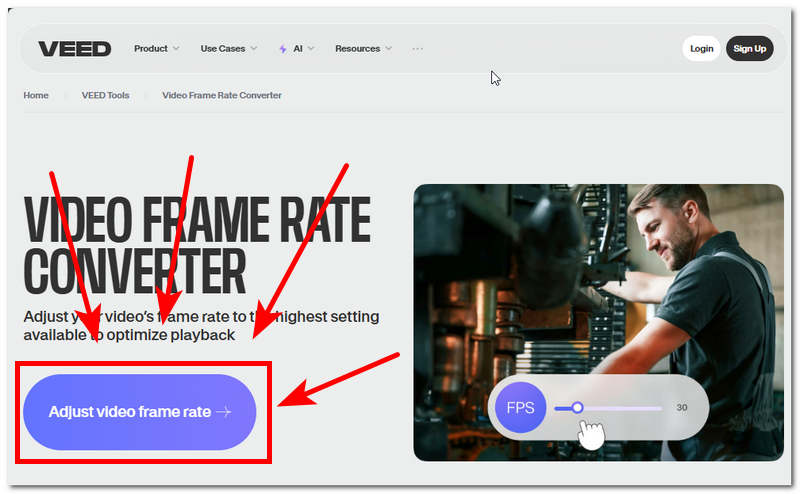
This method uses a web-based tool for changing your video FPS.
Step 1. Go to the VEED.io official website, and from there access their Video Frame Rate Converter tool.
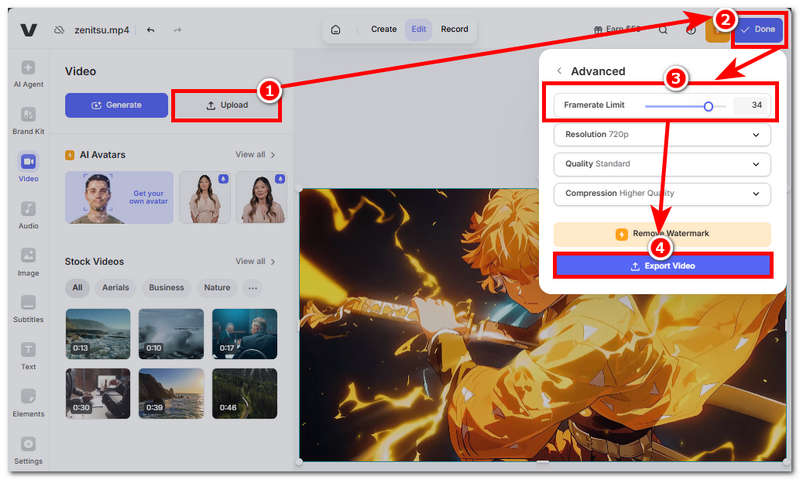
Step 2. Upload your video to the field space provided for it.
Step 3. Access the Framerate Limit setting by clicking on the Done button situated in the top-right corner of the tool. From there, adjust the video framerate accordingly. Once done, save your video to your desktop device by clicking on the Export Video button.
Part 3. FAQs about How to Change Video Frame Rate
Why would I need to change a video’s frame rate?
The need to change or improve a video FPS has become a thing nowadays, to achieve smoother video and a better video playback experience. By using or watching a video with higher FPS, you will be able to see a slow-mo effect on the video.
Can changing the frame rate affect video quality?
Yes, although it may not have a direct effect on the pixel resolution of the video, it helps improve video motion by increasing the number of frames per second. This will eliminate video stuttering and choppy issues, making it smoother and easier to watch.
Conclusion
This article has curated various simplified steps on how to change the frame rate of a video, enabling readers to make the most out of their familiar software tool, including the abovementioned software and online tools used as examples. Moreover, feel free to use the method you are familiar with and comfortable using, whether it is a software or web-based tool. Both can undoubtedly allow you to change and convert your low FPS videos into higher FPS ones.